Are you ready to embark on a journey to create the perfect loaf of nutritious whole wheat bread? This recipe will guide you through the process, combining the art of traditional breadmaking with the science of modern baking techniques. Our nutritious whole wheat bread recipe is not only delicious but also packed with fiber and essential nutrients.
Table of Contents:
- The Science of Whole Wheat Flour
- Ingredients and Equipment
- Mixing and Kneading
- First Rise and Shaping
- Baking to Perfection
- Serving and Storage
The Science of Whole Wheat Flour
Before we dive into the nutritious whole wheat bread recipe, let’s explore the unique properties of whole wheat flour. Unlike refined flour, whole wheat contains the entire wheat kernel – the bran, germ, and endosperm. This composition affects gluten development and hydration in our bread dough.
Whole wheat flour absorbs more water than all-purpose flour due to its high fiber content. The bran particles in whole wheat flour can also interfere with gluten formation, potentially resulting in a denser loaf. To counteract this, our nutritious whole wheat bread recipe incorporates a technique called autolyse, which allows the flour to fully hydrate before kneading.
Ingredients and Equipment
For this nutritious whole wheat bread recipe, you’ll need:
- 3 cups (375g) whole wheat flour
- 1 cup (125g) bread flour
- 1½ teaspoons (9g) salt
- 2¼ teaspoons (7g) instant yeast
- 1⅓ cups (315ml) warm water
- 2 tablespoons (30ml) honey
- 2 tablespoons (30ml) vegetable oil
Equipment:
- Large mixing bowl
- Dough scraper
- 9×5-inch loaf pan
- Cooling rack
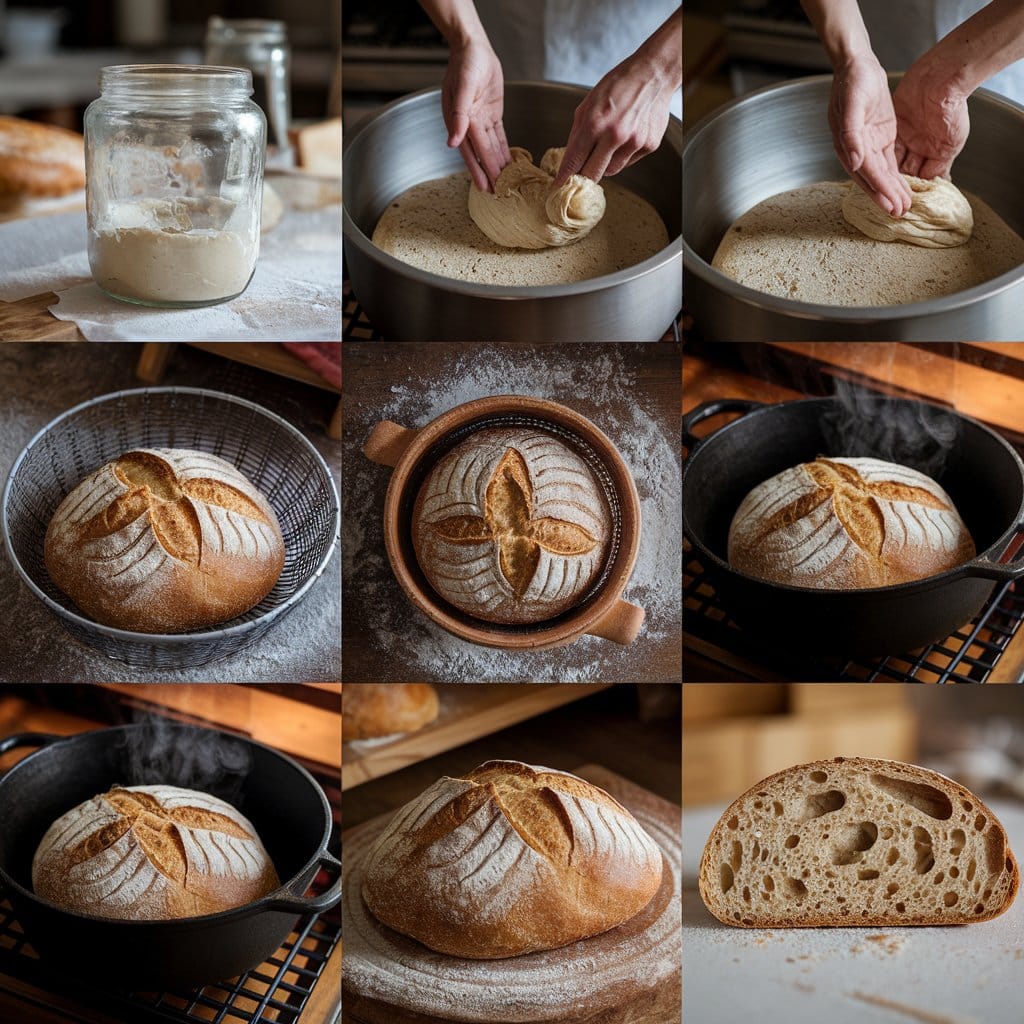
Mixing and Kneading
- In a large bowl, combine the whole wheat flour, bread flour, and salt. Whisk together to evenly distribute the salt.
- In a separate container, mix the warm water, honey, and instant yeast. Let it stand for 5 minutes until the yeast becomes foamy.
- Create a well in the center of the dry ingredients and pour in the yeast mixture and vegetable oil.
- Using a wooden spoon or your hands, mix until a shaggy dough forms. This is where the science of hydration begins. The whole wheat flour will gradually absorb the water, creating a cohesive dough.
- Cover the bowl with a damp cloth and let it rest for 20 minutes. This autolyse period allows the flour to fully hydrate and begins gluten development.
- After the rest, knead the dough on a lightly floured surface for 8-10 minutes. The dough should become smooth and elastic. This kneading process aligns the gluten strands, creating the structure that will give our nutritious whole wheat bread its characteristic texture.
If you’re interested in exploring other bread varieties, check out our recipe for soft Pav Bhaji bread, a delightful Indian street food staple.
First Rise and Shaping
- Place the kneaded dough in a lightly oiled bowl, cover with plastic wrap, and let it rise in a warm place for about 1 to 1½ hours, or until doubled in size.
- Once risen, gently deflate the dough and shape it into a loaf. To do this, pat the dough into a rectangle about 9 inches wide. Roll it up tightly, pinching the seam to seal.
- Place the shaped loaf seam-side down in a greased 9×5-inch loaf pan.
- Cover loosely with plastic wrap and let it rise again for about 45 minutes to 1 hour, or until the dough has crowned about 1 inch above the rim of the pan.
During this rise, the yeast continues to ferment the sugars in the dough, producing carbon dioxide that gets trapped in the gluten network. This process is crucial for achieving the light, airy texture in our nutritious whole wheat bread recipe.
Baking to Perfection
- Preheat your oven to 350°F (175°C) while the bread is on its final rise.
- Once the loaf has risen, gently slash the top with a sharp knife to allow for expansion during baking.
- Bake for 35-40 minutes, or until the bread is golden brown and sounds hollow when tapped on the bottom.
- Remove from the oven and turn out onto a cooling rack immediately.
The baking process is where the magic happens. The heat causes the gas bubbles in the dough to expand rapidly, a phenomenon known as “oven spring.” At the same time, the proteins in the flour coagulate and the starches gelatinize, setting the structure of the bread. (For more on the science of baking, check out this article from Scientific American)

Serving and Storage
Allow your nutritious whole wheat bread to cool completely before slicing. This cooling period is crucial as it allows the crumb structure to set, making it easier to slice without compressing the bread.
This wholesome loaf pairs wonderfully with a variety of toppings. Try it with almond butter and sliced bananas for a nutritious breakfast, or use it to make a hearty sandwich for lunch. For a unique twist, consider using this bread to create gourmet hot dogs, similar to our pretzel buns recipe.
To store your bread, keep it in a paper bag or bread box at room temperature for up to 3 days. For longer storage, slice the bread and freeze it for up to 3 months. Thaw slices as needed for fresh-tasting bread anytime.
Remember, homemade bread like this nutritious whole wheat bread recipe doesn’t contain preservatives, so it won’t last as long as store-bought varieties. However, the superior taste and nutritional value more than make up for the shorter shelf life!
If you’re looking for other homemade bread options, why not try our potato buns recipe? They’re perfect for burgers and add a delightful twist to your homemade bread repertoire.
In conclusion, this nutritious whole wheat bread recipe offers a perfect balance of flavor, texture, and nutrition. By understanding the science behind each step, you can create a loaf that’s not only delicious but also aligns with your health goals. Happy baking!
External Links: